By default, all transactions in the transaction list are sorted by date and grouped by day.
Search Transactions
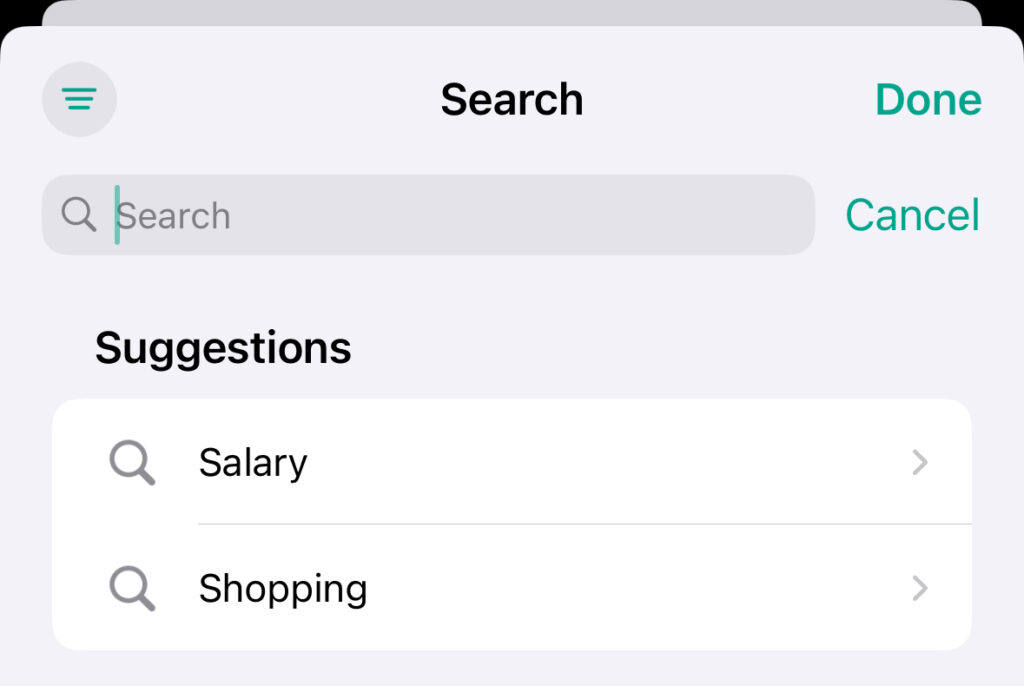
- To search for a specific transaction, you can either go to the the “Overview” or “Transactions” tab and then click on the “Magnifying Glass” icon using the button at the top right.
- This will bring up the “Global Transaction Search”, where you can search for all of your transactions by simply entering the name of the associated category, payee, date, or even any notes content you may have added to a transaction, for example.
Filter Transactions
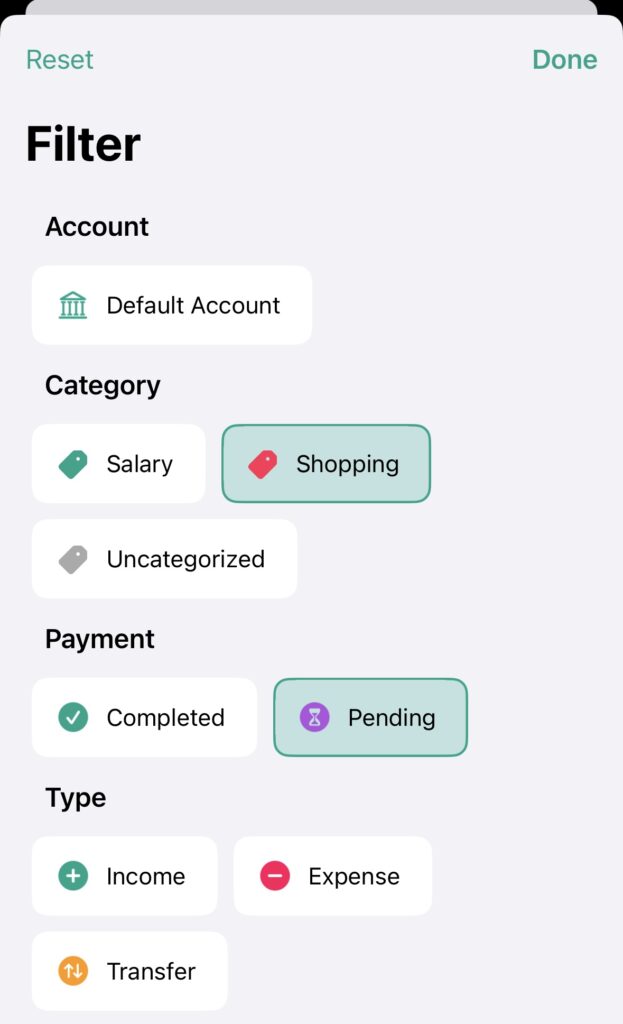
- To further refine your search results based on your search text, you can also filter your transactions, for example, to show only “Shopping” transactions from the last 3 months.
- To do this, click on the “Filter” icon at the top left of the search view.
- A new view will then open in which all assigned properties (e.g. accounts, categories, payment types, etc.) are listed. Properties that are currently being filtered for are highlighted.
- To filter by a specific category for example, simply click on it so that it will be highlighted.
- If you want to remove any filters, you can click on the “Reset” button.
- When you’re finished, click “Done” and the view will close.
Sort Transactions
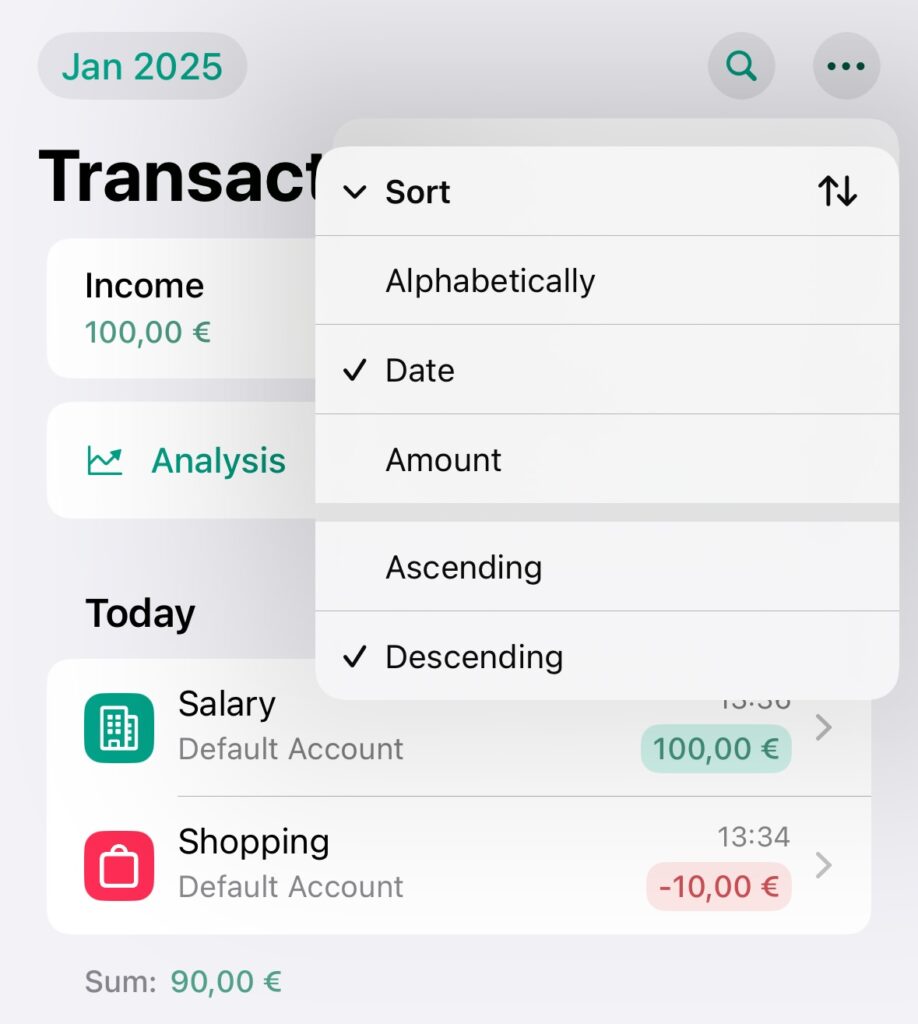
- To sort your transactions in the transaction list, go to the “Transactions” tab, open the “…” menu using the button at the top right and click on “Sort”.
- There you will find various options for sorting the transactions.
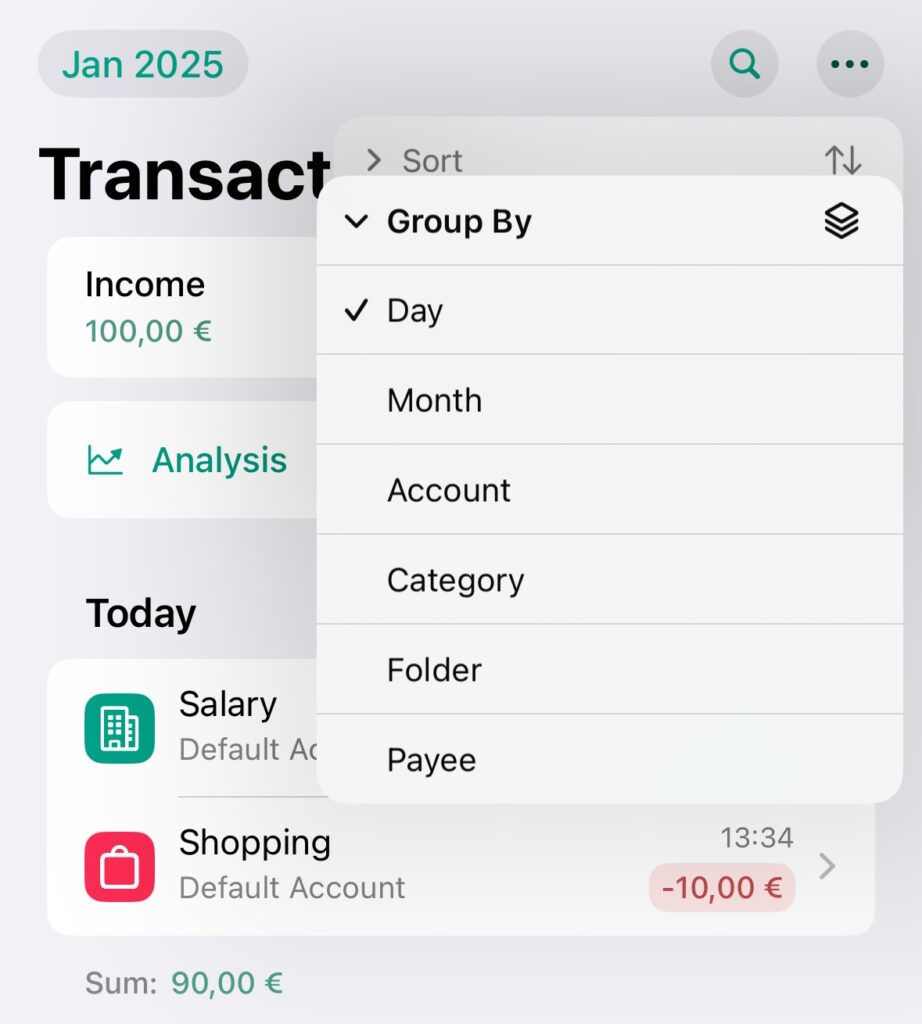
Group Transactions
- To group your transactions in the transaction list, go to the “Transactions” tab, open the “…” menu using the button at the top right and click on “Group By”.
- There you will find various options for grouping the transactions.