A key feature of Budget Flow is the creation of transactions. In this tutorial you will learn how to do this and which properties you can configure.
Create a Transaction
- To create a new Transaction, open either the “Dashboard” or “Transactions” tab of the app. In the “Transactions” view, you will see all the Transactions that exist in the currently active Budget Book. By default, Transactions are sorted by date and grouped by day. However, you can change this at any time by clicking on the “…” icon in the top right corner and selecting “Sort” / “Group”.
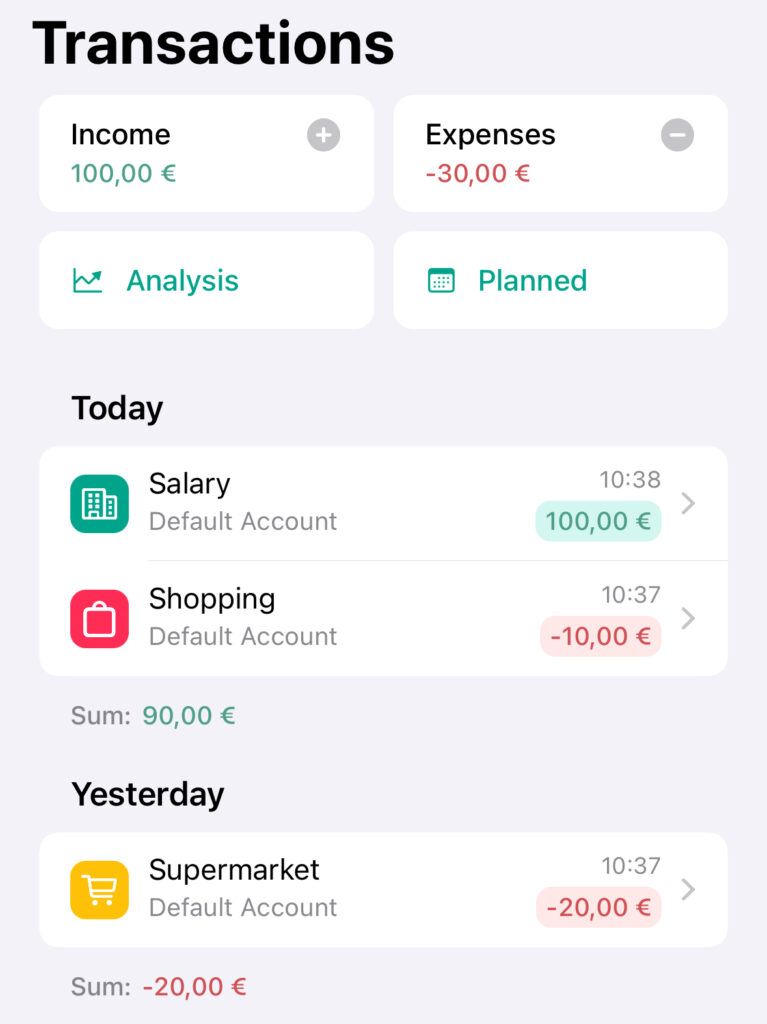
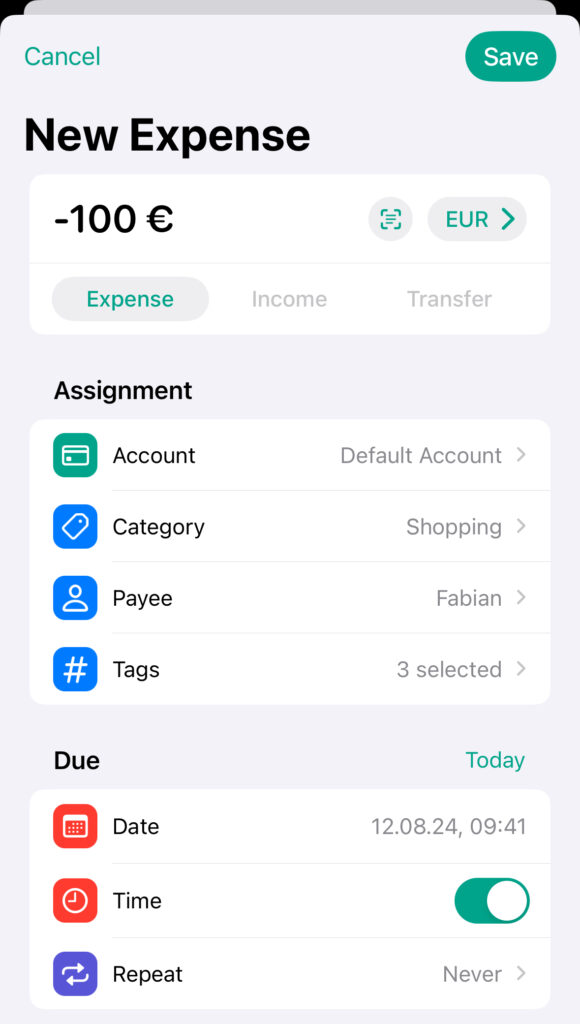
To create a new Transaction, click on the “+” button. Next you will see a new view where you can set the properties of the Transaction:
| Property | Description |
| Amount | The amount of the transaction (e.g. -100 €). |
| Currency | The assigned currency of the transaction. By default, the currency of the respective account is selected here (e.g. “Euro”). However, it is also possible to specify a foreign currency including the exchange rate by clicking on the button to the right of the amount (“EUR >” in the screenshot). |
| Exchange Rate | The optional exchange rate of the transaction if a foreign currency is used. |
| Type | The type of the transaction (e.g. income, expense, transfer). The setting affects the amount. Income is always positive while expenses are always negative. For transfers, two transactions are created by default, with the first being negative and the second positive. |
| (From) Account | The assigned (from) account of the transaction. In the case of transfers, this is the account from which the respective amount is debited. For more information about accounts and which features to use click here. |
| (To) Account | [Only available for transfers] The assigned (to) account of the transaction. This is the account to which the respective amount is added. |
| Category | The optional category of the transaction. If no category is selected, the transaction is displayed as “unassigned”. For more information about categories and which features to use, click here. |
| Payee | The optional payee of the transaction. For more information about payees and which features to use, click here. |
| Tags | The optional tags of the transaction. For more information about tags and which features to use, click here. |
| Day | The date on which the transaction took place or will take place. If a past date is selected, the transaction will be added directly to the list of transactions and included in the calculations. If it is due later, it is first moved to the “Planned” area of the app and automatically added at the due date. |
| Time | The optional time on which the transaction took place or will take place. |
| Repetition Interval | Indicates the period for which the transaction is repeated (e.g., never, monthly, etc.). |
| End Date | The optional end date of the transaction repetition. As soon as this value is exceeded, the app will no longer automatically create new transactions for the specified values. For example, if a monthly lease payment for a car was previously automatically debited on the 1st of each month and the “End Date” was set to August 1st, 2024, no new transactions will be created for the lease payment after September 1st, 2024. |
| Reminder Date | [Only available for future and repeating transactions] Specifies at what time the app should send a reminder about this transaction via push notification (e.g. 1 day before). |
| Pending | Indicates whether the payment of the transaction is pending so that the amount will not be included in the calculations (e.g. balances, etc.). For more information about pending transactions, click here. |
| Evaluated | Indicates whether the transaction should be excluded from the statistics in order to evaluate it only in the account balance. By default, the value for transfers is set to “False” so that statistics such as income / expenses are not distorted when money is only transferred between two accounts. For more information about evaluated transactions, click here. |
| Location | The optional location of the transaction. |
| Notes | The optional notes of the transaction. |
| Attachments | The optional attachments of the transaction (e.g. photos or PDF documents). |
- Finally click on “Save”. Your newly created Transaction will then appear in the list of all the Transactions that you have created.
Edit Transactions
Edit a Transaction
- After you have created a Transaction, you can edit it at any time. To do this, navigate to the “Transactions” tab as you did when adding.
- To edit a Transaction, either swipe from right to left and click on the “Pen”-icon, or long press to open the context menu and select “Edit”.
- After that, you can modify your existing Transaction as you like and finally click “Save” to save your changes.
Delete Transactions
- To delete a Transaction, go to the “Transactions” tab again.
- To delete a specific one, either swipe from right to left and click on the “Trash”-icon, or long press to open the context menu and select “Delete”.
- You can also swipe from right to left and click on the “Pen”-icon or long press to open the context menu and select “Edit” to edit a specific Transaction. At the bottom you will then find a “Delete Transaction” button with which you can delete the currently edited Transaction.
- After that, a dialog will appear asking you to confirm the deletion. Once you confirm, the corresponding Transaction will be deleted.