Budget Flow lets you keep track of your income and expenses and manage them effortlessly. Here is a quick guide to help you get started with the most essential features of Budget Flow.
Basic Structure
When opening Budget Flow, the first thing you will see is the overview page. Here you can get an overview of the most important key figures such as your account balances, total income / expenses but also quick access to suggested categories for transactions and more. Here is a brief overview:
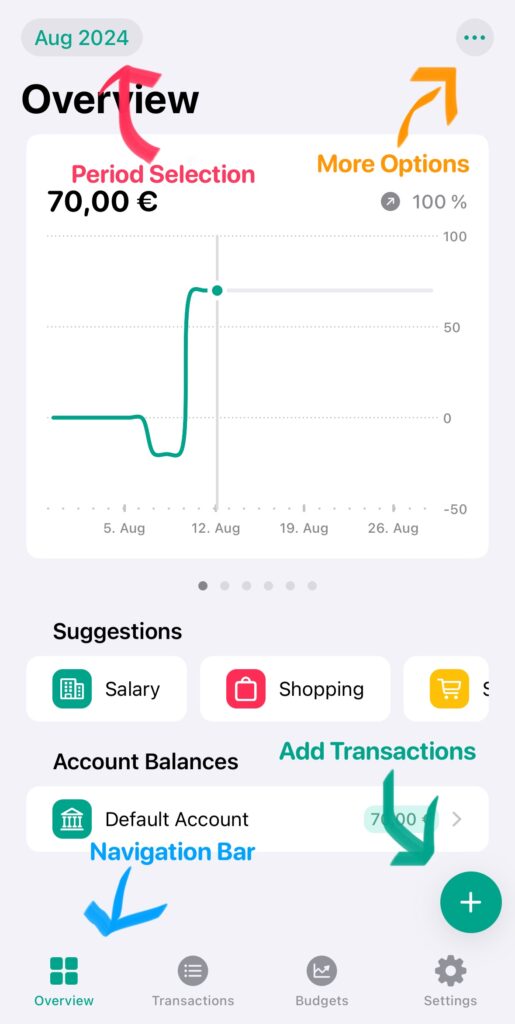
Let’s go through all the highlights from the screenshot step by step:
Navigation Bar
The navigation bar is located at the bottom of the screen on the iPhone and on the iPad / Mac on the left in the form of a sidebar. However, the basic menu items are identical.
| Item | Description |
 | In the overview page, you can get an overview of the most important key figures such as your account balances, total income / expenses, but also quick access to suggested categories for transactions and more. |
| In the transaction list, all transactions are displayed in the form of a list depending on the selected time period. For more information about transactions click here. | |
 | In the budget list, all budgets are displayed in the form of a list depending on the selected time period. For more information about budgets click here. |
 | In the settings page, you can manage your budget books, accounts, categories, etc., import / export CSV files and make other adjustments such as customizing the look of the app and much more. |
Add Transactions
Now that you know the basic structure of the app, you can create your first transaction. To do this, click on the “+” button at the bottom. Next you will see a new view where you can set the properties of the transaction:
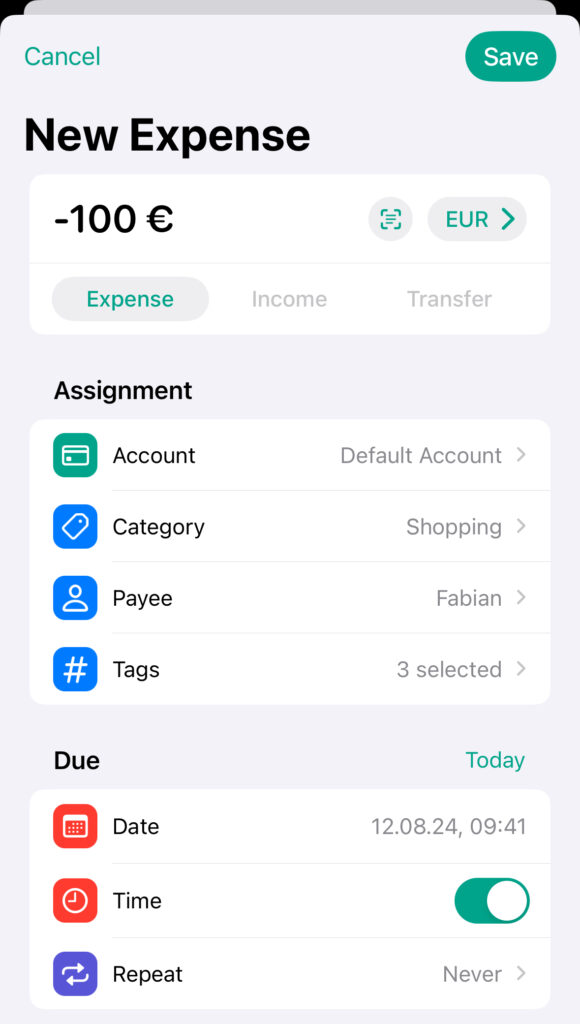
For more information about transactions, check out: How to Create, Edit and Delete Transactions.
Add Budgets
In addition to transactions, you can also create budgets. These serve as spending limits to help you better control your spending. To do this, open the “Budgets” tab of the app and and click on the “+” button at the bottom. Next you will see a new view where you can set the properties of the budget:
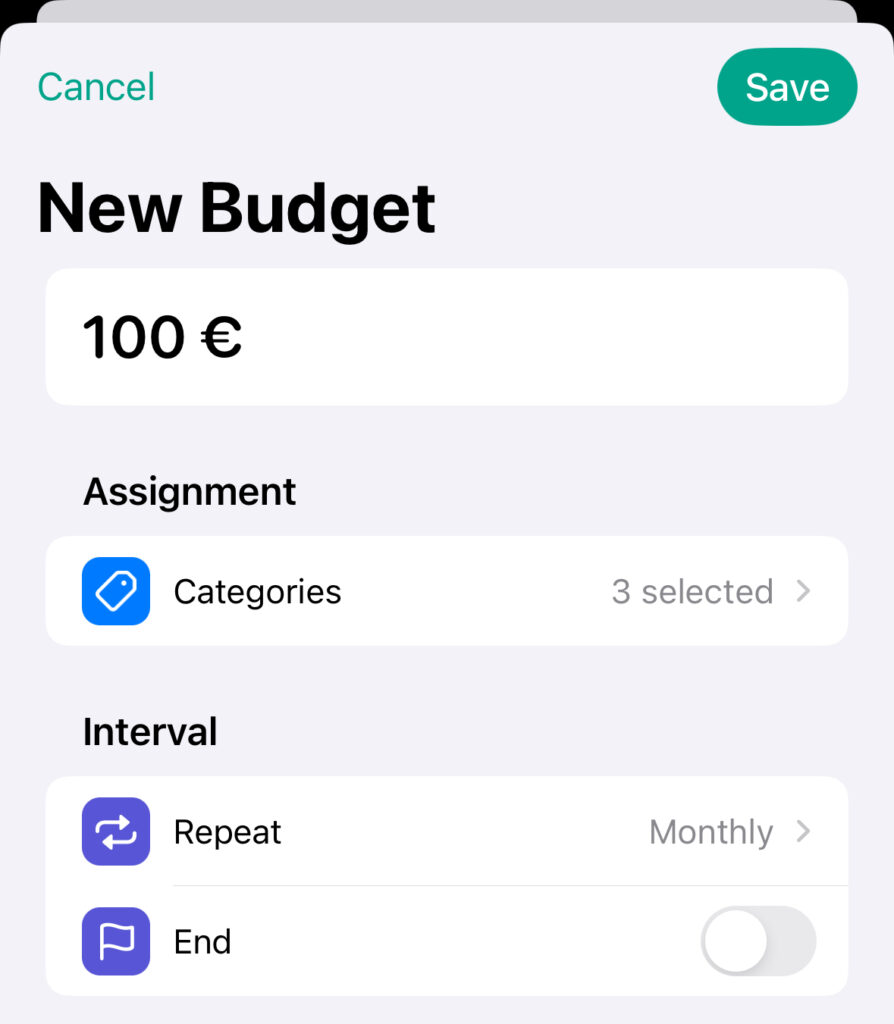
For more information about budgets, check out: How to Create, Edit and Delete Budgets.
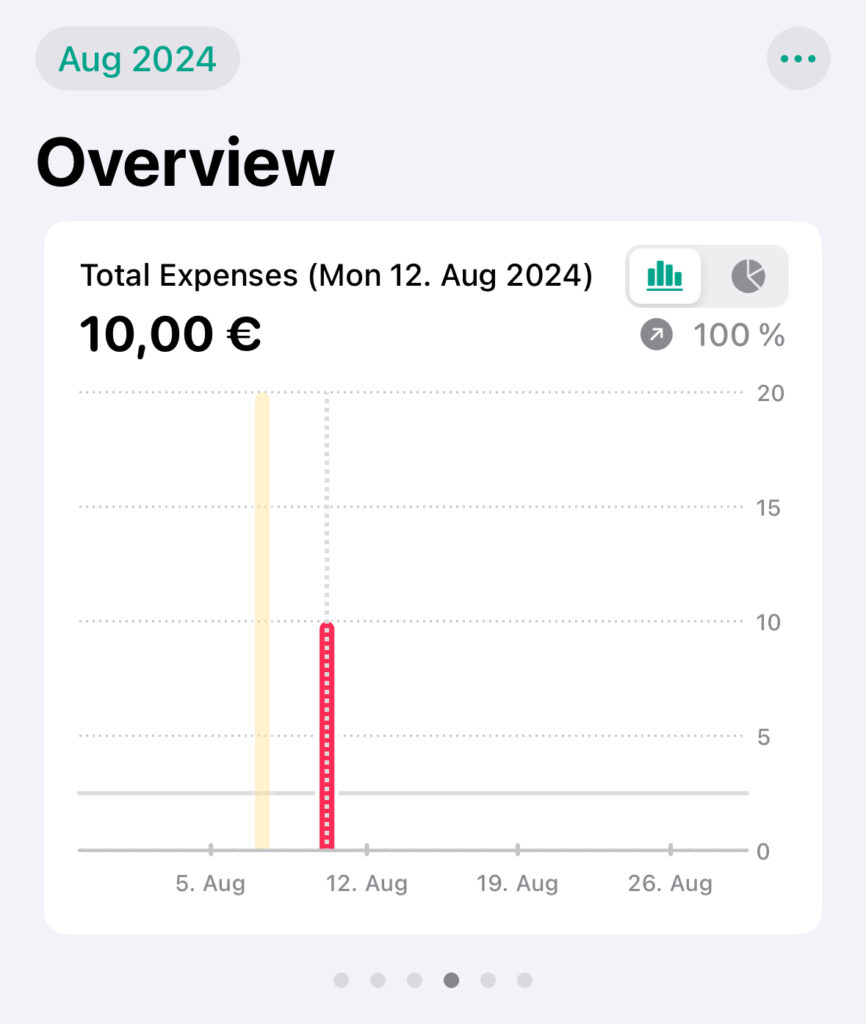
Using Charts
Now that you have added some transactions, you will see that the widgets (e.g. the chart) on the overview page have changed. To ensure a good overview, the diagrams are arranged in a stack.
To switch between the charts simply swipe left or right to change the active chart. The active chart will also remain even if you close and restart the app. In addition you can also long press on a chart to view the values for a specific date.
For some charts (like the total expenses), you can also switch between a bar chart and pie chart using the button at the top right. However, this function is only available on iOS 17 and newer.
Period Selection
By default, the current month is displayed and the transactions, charts, budgets, etc. are adapted and filtered according to the respective period. However, to see transactions from previous periods (e.g. from last month), you can easily set the current period using the “Period Selection” button at the top left.
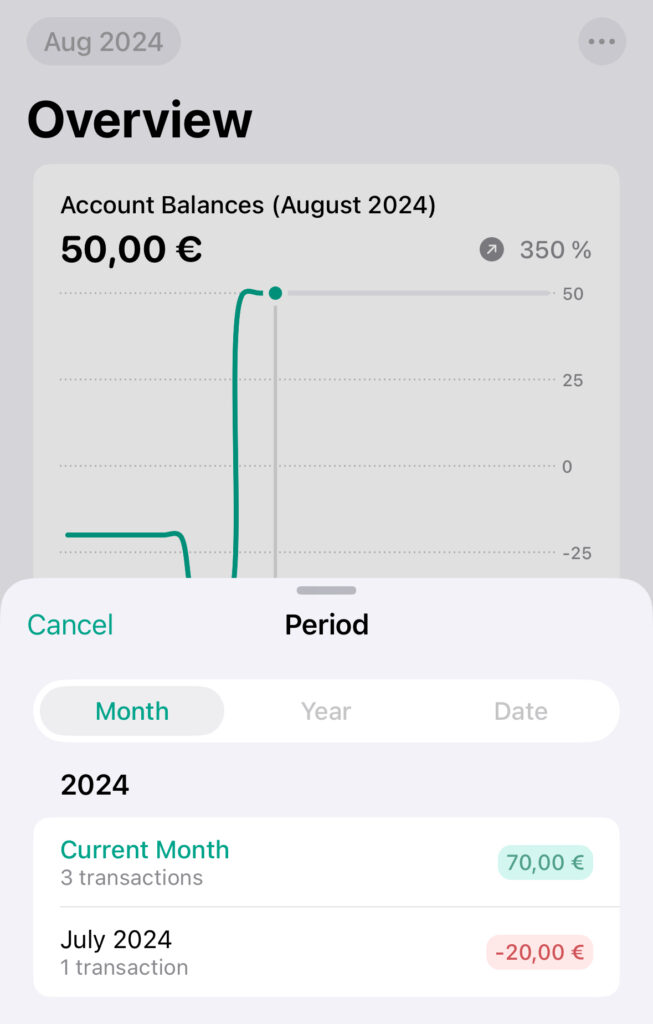
As you can see in the screenshot, after clicking on the button, all the months / years are displayed for you to switch between. The oldest month is the one with the oldest transaction.
You can also see that after each month / year, the balance for that period is displayed. However, if you open the period selection view in the budget list, the total remaining budget of each month / year is displayed here.
Besides switching between months / years, you can also filter by your own time period by clicking on the “Date” tab and entering the start and end dates.
More Options
Under the “…” button you will usually find further menu items where you can make further options. In the case of the overview page, for example, you can filter the accounts displayed or configure the widgets, while in the transaction list you can filter, sort and group the transactions displayed.
Done! 🎉 Now that you know the basic features of Budget Flow, feel free to read more tutorials to learn more about Budget Books, Accounts, etc. to import existing data using CSV files, or to share your Budget Book with another person.